
Quickstart Guide and Best Practices
Octopi Trader Installation, Basic Configuration & Troubleshooting
This document helps users walk through installation best practices and a very basic first configuration to get familiar with Octopi <-> Sierra interface and verify operation of all components.
Tutorials on our Youtube channel: Octopi Trader Trader
For any questions, please first see our Discord Support Channel
Best practice is to
- Create a copy of your Sierra Chart directory OR Installing a new copy of Sierra Chart for Octopi Trader Trader to be installed into (More info below)
- Disable/Pause any Antivirus applications during the Octopi Trader Trader installation. Once installed, white-list the entire Sierra Chart directory to avoid any of the working files from being removed
- Configure your new Sierra Chart application with a very simple single-instance
- Configure Octopi Trader Trader with a simple 2 SMA system
- Test and validate that backtesting works and executions are triggered as expected
- Please watch all the videos on the YouTube channel before installing
First steps:
- Go to Octopi Trader Trader website, subscribe with your Sierra Chart username, and download the installer
-
- Look for the welcome email, it might be in your spam folder
- Once downloaded, Right-click the Octopi Trader installer, select Run as Administrator
- Be sure to point to the copied/new/test Sierra Chart directory
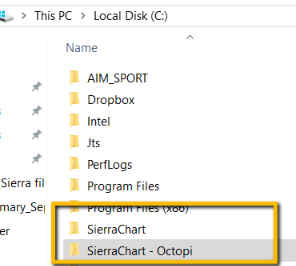
- Now for Sierra: Look for your Sierra Chart directory. Copy the main directory so you are testing with a backup, rename the copy to Sierra Chart-Octopi Trader:
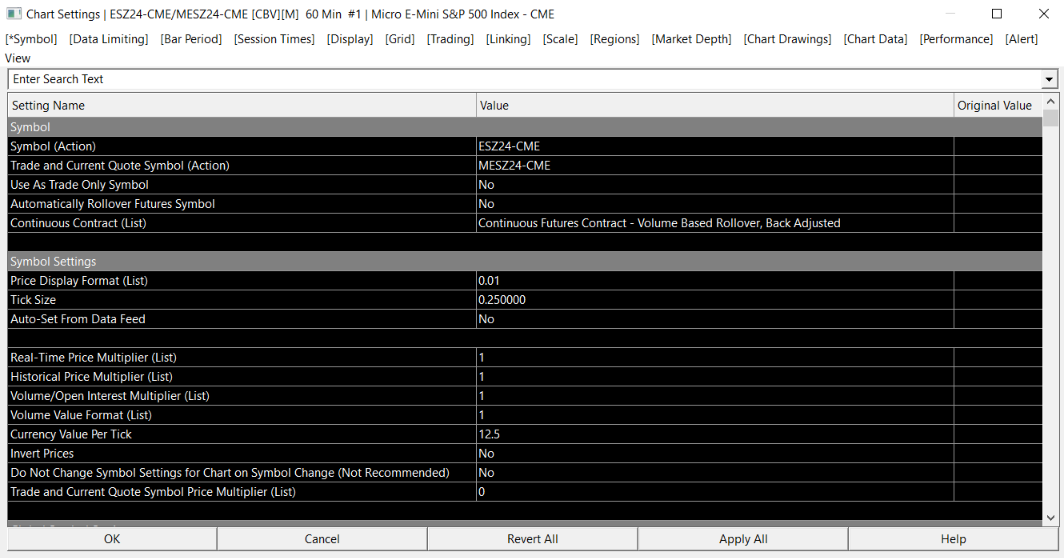
- Add the current ES contract
- Chart, Chart Settings, Symbol
- Chart, Chart Settings, Symbol
- Make sure you have Chart#1 only. Octopi Trader MUST operate on Chart #1
- Set Bar period to 60 minutes
- Add four studies to the 60 minute chart
- 5 SMA
- 20 SMA
- ATR, make it hidden
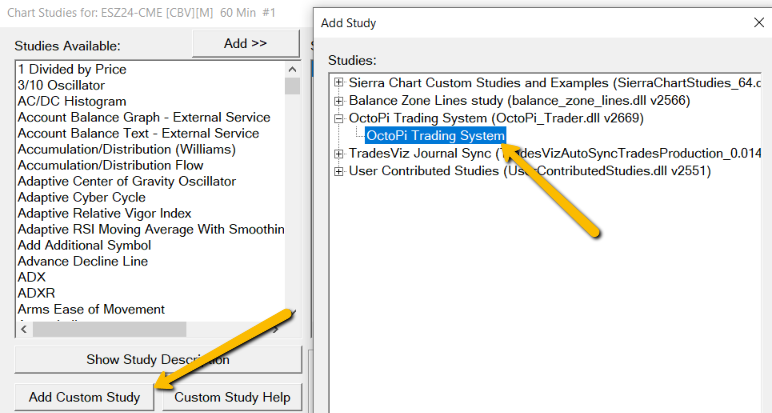
- Octopi Trader
- Add Custom Study, Select Octopi Trader Trading System
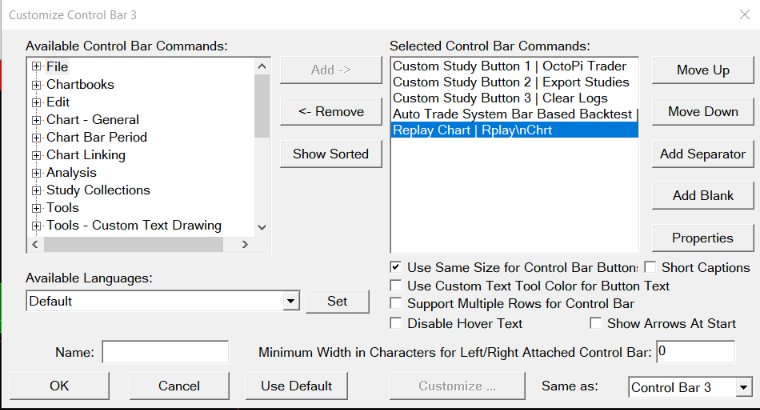
- Configure the custom Octopi Trader toolbar
- Go to Window → Control Bars → Control bar #.
- Add the following buttons to the control bar: Custom Study Button 1, 2, and 3, Auto Trade System Bar Based Backtest, Replay Chart
- Global Settings, Customize Control Bar
- Your Custom Control bar should look like this:
- On the 60 minute chart
- Trade, select Show order Fills & Show Orders and Position
- Press the Export Studies button, this will send the studies you just created to Octopi Trader Trader
- Be sure to save your chartbook!
- Let’s setup Octopi Trader
- Run the application
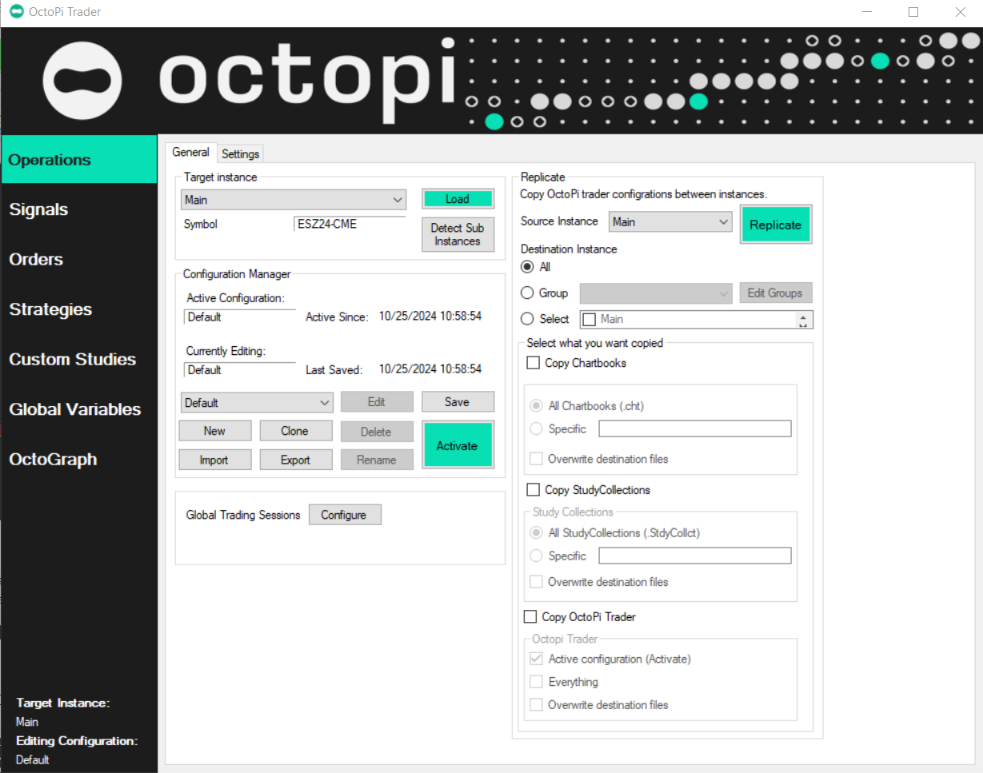
- The Operations tab should auto-populate your symbol:
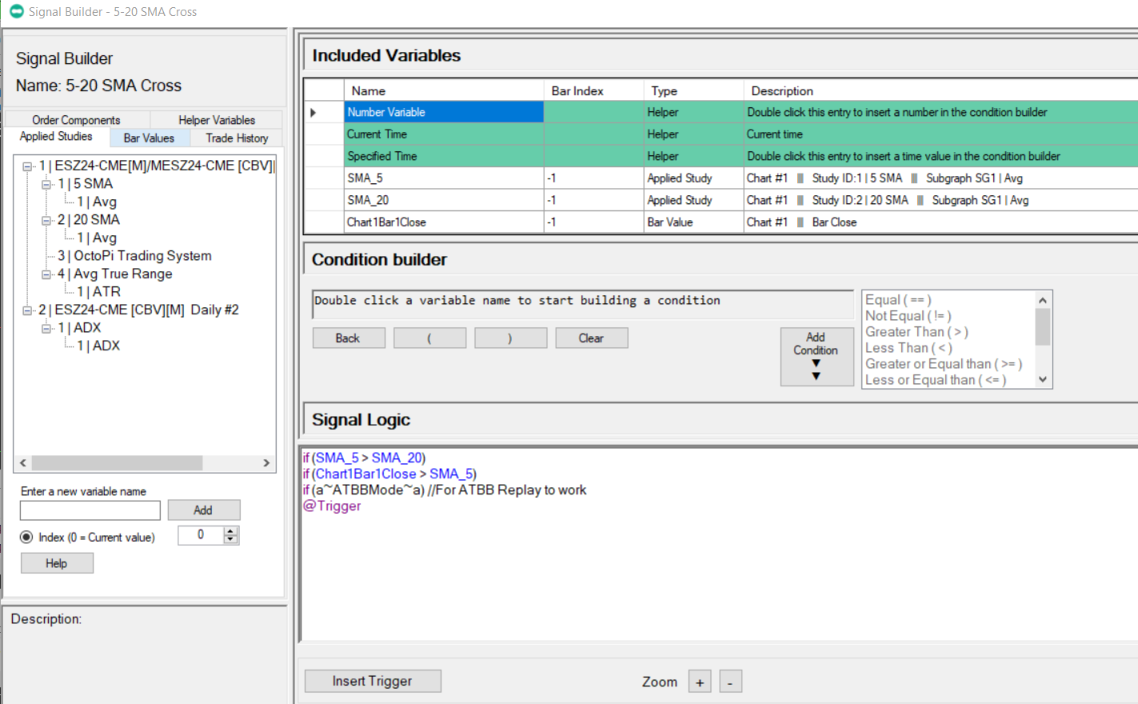
- Click Signals, New
- Give the Signal a name, like 5-20 SMA Cross
- Watch this video: How to use Signals & Custom Studies
- Your setup should look something like this:
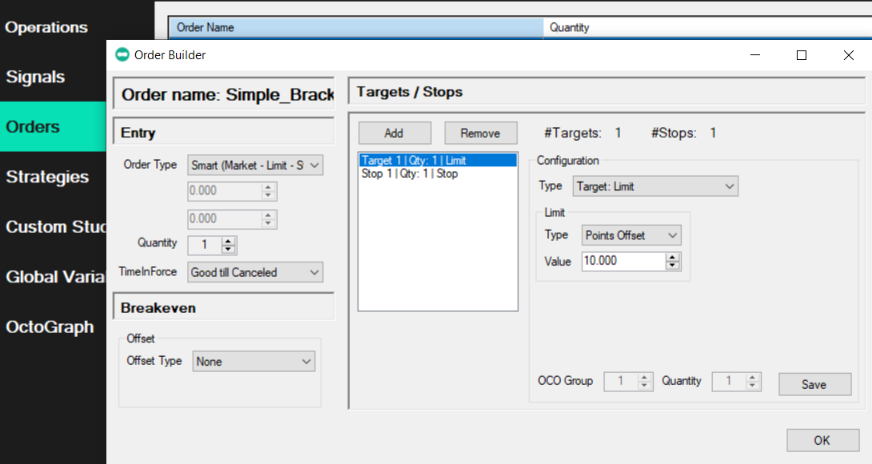
- Click Orders, New
- Give the Order a name, like Simple_Bracket
- Watch this video: Orders. How to create, tips and tricks
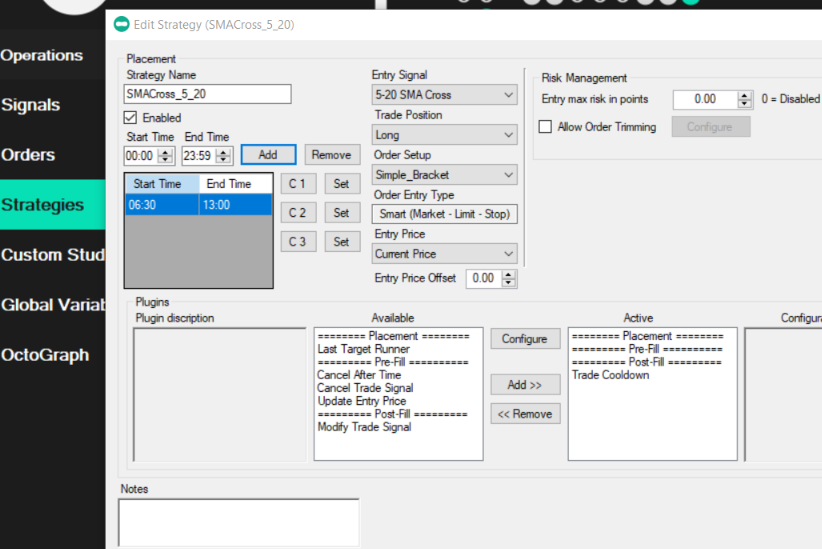
- Click Strategies, New
- Name the Strategy, like SMACross_5_20
- Watch this video: Strategies. How to compose and few notes on usage
- Your configuration should look something like this:
- Now you are ready to run a back test to validate the connection between Octopi Trader Trader and Sierra Chart. You are also validating the configurations.
- Validation test: BackTesting
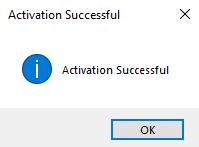
- If all is correct, Once you click "Activate" on the main Operations window of Octopi, you will receive a message like below:
- If the message mentions errors, it’s best to reach out to support or follow message details to cure the issue
- Set to Sim mode, Trade, Trade Simulation Mode On
- Disconnect your data feed. File -> Disconnect
- On the Octopi Trader custom toolbar, click Clear Logs
- On the Operations tab, click Activate.
- Click the Rplay Chrt button on the Octopi Trader custom toolbar
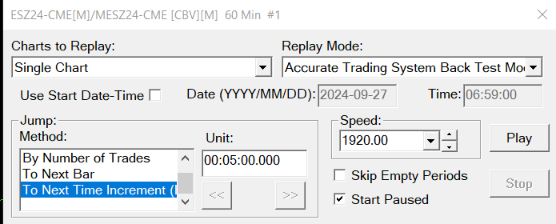
- Your configuration should look like this. Make sure Star Paused is selected:
- Drag the slider all the way to the left, so the bars displayed are at the beginning of the dataset
- On the Chart Replay window, press Play (first time, this will clear any data right of what is visible and started replay PAUSED)
- Clear All Trade Data for Symbol and Account
- On the Octopi Trader custom toolbar, click the red Octopi Trader Trade button so that it turns Green
- Press Play (This will now begin replaying your chart with trades executing)


The backtest should start. Depending on the Sierra Chart backtesting scheme you use (either Tick or ATBB), the size of the dataset, and your system's speed, it could take a few minutes to a few hours.
Under Trade, Trade Activity Log check the results.
This system is not intended to be profitable; it is only meant to validate your installation.
Once you are able to complete a backtest, now you can start the real work of building your own strategies.